Portfolio 1
How To’s for Mason’s Data Science Class
Aims of this document
Throughout her modules, Mason delves into detail on a number of different elements, explaining their different uses and how they can be useful to you. Similarly, when discussing how to do different tasks, she will often provide different ways that aim can be accomplished. This approach is very reasonable and is the one I would take – it provides training that goes above and beyond the specifics for this individual class. Other web-based videos take this approach too.
One limitation of this approach, however, is it can be challenging to accomplish fairly straightforward tasks, especially at the beginning of the semester, with all of the information that is provided. Thus I put together (for myself) this list of how to accomplish certain tasks, with a particular emphasis on those related to Git / Github, though with a brief description of some R studio tasks as well. This does not delve into the ‘why’s (e.g., it doesn’t discuss the difference between Git and Github) and is intended as a companion to what is already provided in Mason’s modules, as a brief reference guide. I’m making this publicly available in case it’s helpful to others. It is intended to be a ‘living document,’ to be updated to include more up-to-date information, other useful tips, etc.
As a secondary aim, in some cases I have also provided descriptions of how this approach differs from what was seen in my graduate class using SPSS.
This document assumes that you have already: (1) installed R and R studio, (2) set up a Github account, and (3) installed Github Desktop.
How do I find the files for a particular lab?
All the relevant files are stored in Github, in a “repository” associated with that lab. Mason’s Github account is: https://github.com/DataScience4Psych (not to be confused with https://datascience4psych.github.io/DataScience4Psych/, as I did originally). Go to her Github account, and under repositories, search for the relevant one (e.g., by typing in lab 01). Then click on the relevant repository.
Once you’ve done that, the relevant repository should show up. For example, for the first lab, it should direct you to https://github.com/DataScience4Psych/lab-01-hello-r . This contains all the relevant files for the first lab. It looks like:
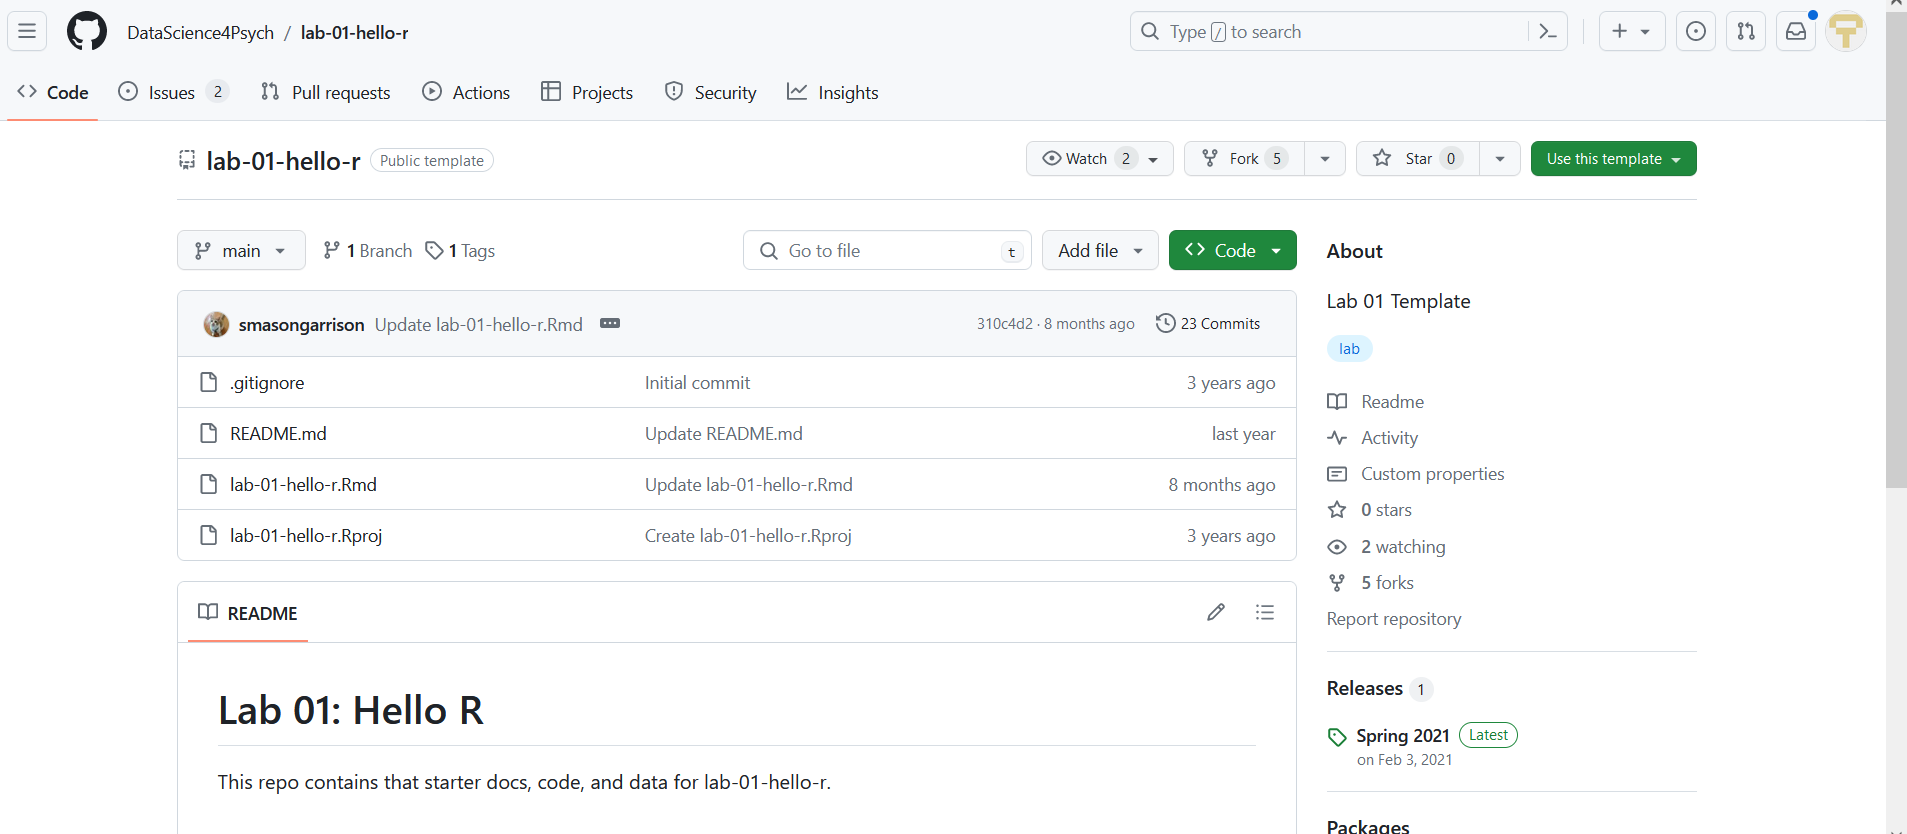
How do I get the relevant files on my computer?
You need to get the relevant files both on your computer, and on your personal Github account. Thankfully, there’s a way to do all of that in two steps. The basic idea is you’re going to just copy (‘clone’) everything from Mason’s account onto yours.
First you will get her files onto your Github account. To do that, access the relevant repository from her Github account and:
- Click Use this template -> create a new repository
- This will take you to a page where you will need to specify the owner (should be filled in already – this is you), and a name for the lab that you’ll fill in (e.g., lab 1).
- You can click public or private (Mason’s module explains the difference).
- Click Create Repository
This will then create a copy (clone) of Mason’s repository on your Github account. However, you still need to get the files onto Github Desktop and onto your personal computer. To do that, from your repository (that you just created):
- Click Code -> Open with Github Desktop
- This will produce a pop-up with the address of your github, and the path on your computer. For example, for the 5th lab, mine looked like the following:
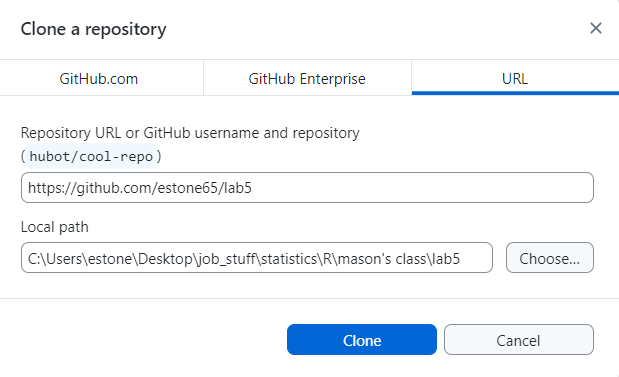
- Typically this should all be correct. In that case, just click Clone.
Notice that a folder with the relevant files has now been created on your computer, and you can access the folder from within Github Desktop.
How do I find the relevant repository on Github Desktop?
If the relevant repository does not show up, then on the upper left, go to Current Repository. You can change that to whatever repository you are interested in.
How do I get the relevant files into Rstudio so that I can work on them?
Within the relevant repository / folder, click on the .Rproj file. .Rproj stands for the entire project related to that assignment. It will pull up all the files you need within Rstudio.
Then, on the files pane, click on the .rmd file to pull up the R markdown file.
How (Where) to answer the questions that Mason asks in her assignments?
Short Version: You will provide your answers in the R Markdown document.
Longer Version: I initially thought of an R markdown file as analagous to an SPSS syntax file. That is accurate in the sense that the R markdown file runs code sequentially, but it also can be considered as analagous to a word document that you can embed R code in. One nice element of this is that you can include both your code and your answers to questions within the Markdown document, unlike my class, where you had to write up the answers in a separate word document or by hand.
How (Where) are my answers stored?
When you run (knit) the R markdown (.rmd) file, it will create an .md file. This is similar to an output file created by SPSS. This .md file can then be provided to Mason. Note that – unlike with SPSS – it will typically be necessary to provide Mason the .md file, rather than just the R markdown (.rmd) file. The reason for this difference is that the R markdown file will often contain commands that are specific to your workflow (e.g., the path to access files, what packages have already been loaded, etc.) So if Mason just runs your R markdown file, she will likely get an error message (with SPSS, if you have the syntax file and the data file it’s straightforward to reproduce the output file).
How can I make my files visible so that Mason can see them?
When you make changes to your R Markdown file, these will be stored only on your personal computer. These need to be transferred to your Github repository, so that Mason can see them. To do this, you’ll need to do two things: (1) commit your changes, and (2) push to your github repository (your repository goes by the name ‘origin’). (Think of ‘push’ as sending it out from your computer to the internet.)
Within Github Desktop: 1. Make sure the .rmd and .md files are checked. For example:
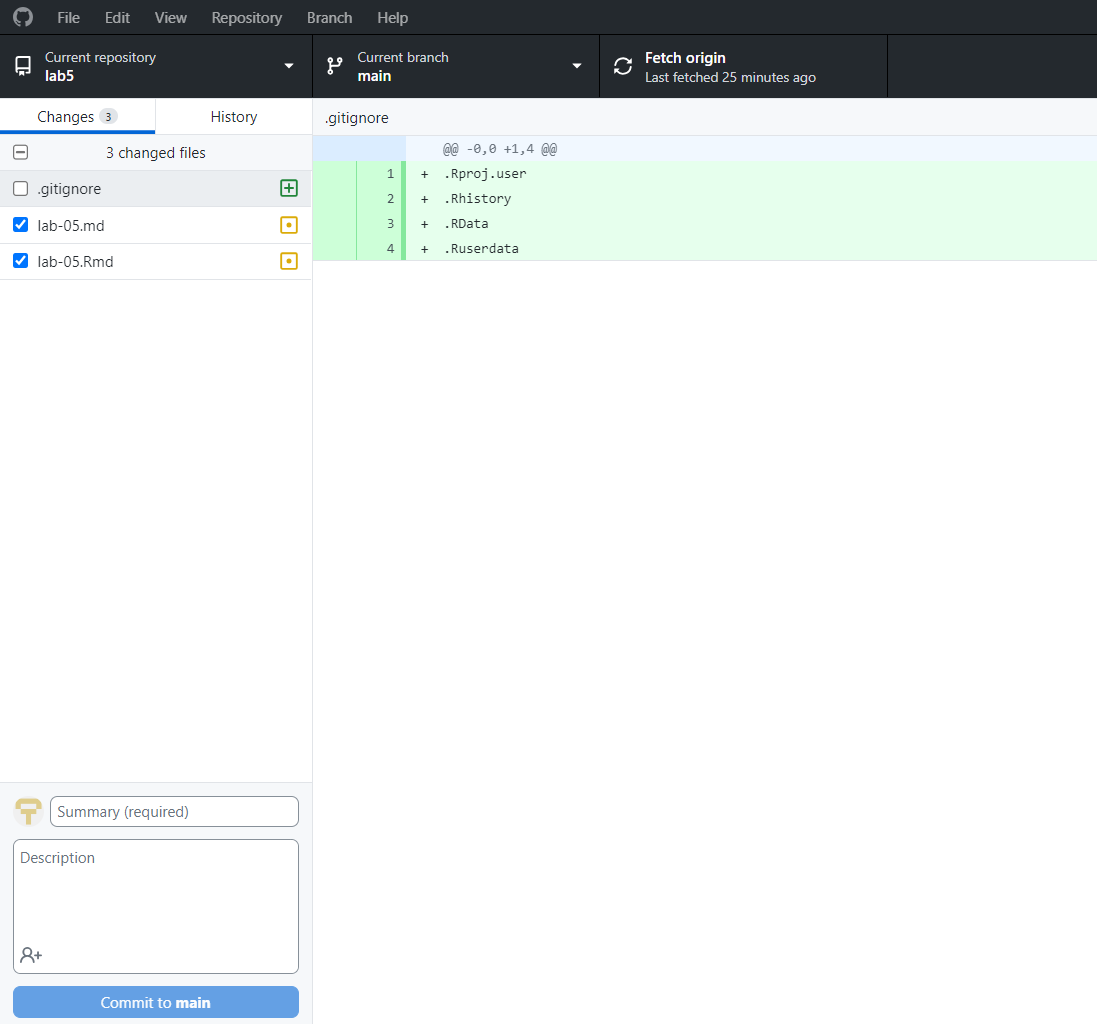
Type in your summary (e.g., “progress made!”), and click on Commit to Main.
Then Click Push to Origin.
Once you’ve done all that, you will have committed your changes (essentially saying, yes, I want these changes to be included), and sent them to your origin (read: your Github repository for this specific lab).
How can I notify Mason that my lab is done?
Mason will not know that you have completed the lab until you tell her. To notify her of that, you open an “issue.” To do that:
- Go to class’s github (not yours), and access the relevant lab (i.e., the one you cloned).
- Click Issues
- Click New Issue
- Add a title
- Under description, write:
- @smasongarrison
- the link to your repository (e.g., https://github.com/estone65/lab5/ )
How can I read Mason’s comments on my lab?
Mason is likely to comment by making a ‘pull request’ within your R markdown document. Because it isn’t her document (it’s yours), she can make a copy of the file and make changes to that, but she can’t make changes to your document. The pull request is essentially a list of suggested changes, which can take the form of comments within your document(s). The changes will be color-coded.
You will receive an email notifying you of the pull request. Click on the pull request to view the changes.